
Copic Ciao markers: DIY Label + Color Chart
So, just last week - I finally got my Copic Ciao Set B markers and I am estatic! More colors to play with :) And when I got my Ciao markers, first thing I did was to make my own lid labels.

So before I show you how ...
For those who are new to Copic markers, here's a quick difference between the types of Copic markers in the market.
1. Copic Sketch markers


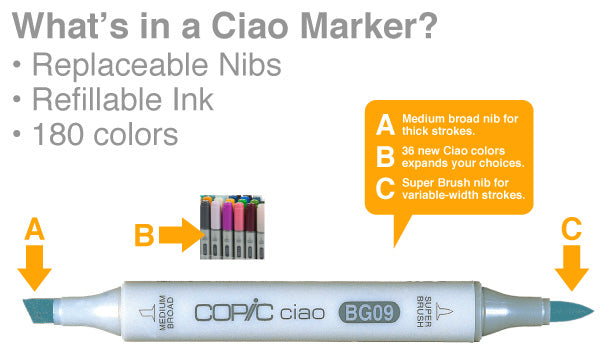
2. Copic Ciao markers

3. Copic Wide markers


Images taken from the Copic store.
***
As you can see, the Copic Ciao markers do not have a label on their lids. They are the most economical - guess that's why we have to label it on our own :)
Fret NOT! I have the simple solution for you.
***
1. Download the Copic Ciao lid labels from Asela Hopkin's blog HERE.
Thanks Asela for the free file!
2. Print the chart out and start punching with a standard sized office-2hole-puncher!
3. Get some mini glue dots and stick it onto your Ciao marker's lid and ... this is the beautiful result! Pssst... I re-arranged them in their color groups too! :)

(At the time I took this shot, I couldn't complete labeling it as I ran out of mini glue dots.. haha! But you get the drift)
Oh!! And I also did a color chart for my markers too.

Here's the color chart I used - created by Ellen Jarvis (Thanks!) HERE.
Hope this post has been helpful for all Copic Ciao lovers :) Have an awesome week ahead.

3 comments
Thanks so much for the chart for the caps on the ciao copic markers. I have been looking for this and haven't been able to get through a link to it until I found it on your site. So happy to finally get through and able to print it off. Thank you again! Nana
ReplyDeleteSo glad it helped you Nana :) have fun !
DeleteThank you! my markers look awesome now! :)
ReplyDeleteThank you very much for stopping by and leaving comments. Have a lovely and blessed day!