Scrappy Scrappy

Facebook Instagram Youtube Twitter Bloglovin
HOME | SCRAPPY RESUME | VIDEOS | CONTACT ME
I managed to get my hands on Tim Holtz's Frosted Film from Scrap-n-Crop.com and I made this cute little frosty tag with it!


Here's a close up


For the step-by-step tutorial on how I made this tag - click HERE.

I can't wait for Christmas!!!

Share
Tweet
Pin
Share
No comments

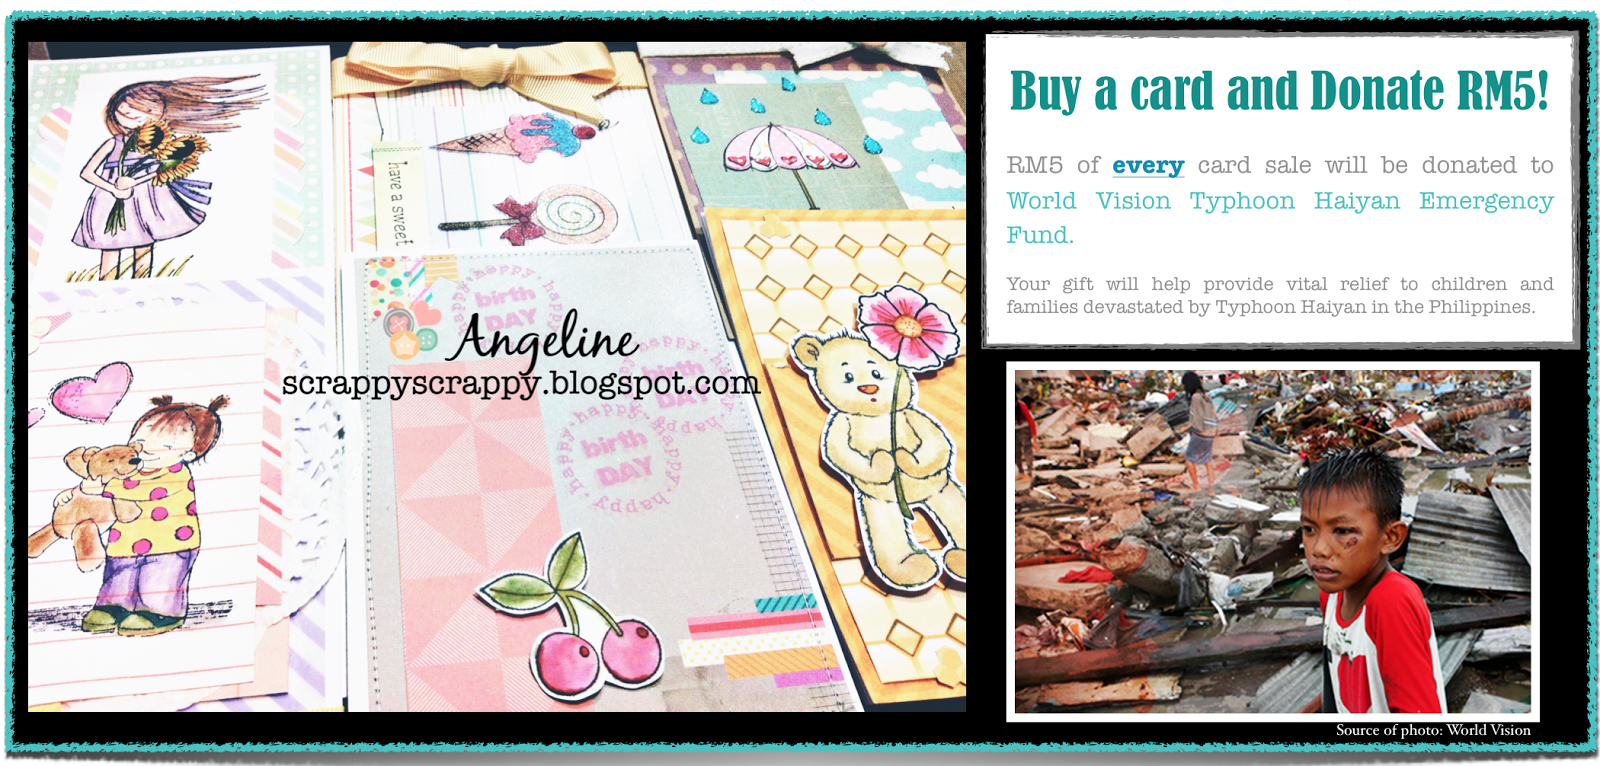
I am having a special cards sale on my FB page HERE to raise funds for the victims of Typhoon Haiyan in Philippines. 

Every card is going at RM15 and for every card sold - RM5 will be donated to World Vision Typhoon Haiyan Emergency Fund {here}
[Price does not include shipping charges]

Your gift will help provide vital relief to children and families there. Every dollar counts.

Thank you for your giving and support. 

Share
Tweet
Pin
Share
No comments
Welcome to the Black Diamond Deals Blog Hop brought to you by the All that Stickles design team!


The biggest shopping day of the year is just around the corner, and the ATS design team has put together some fun, sparkly shopping projects to help inspire those shopping lists! (And maybe the shine from all the glitter will help wake you up in the middle of the night to hit the stores!)

 If you've come from Sonia's blog, you're in the right place! If you've just come across the hop, please visit All that Stickles.

***

Since the theme is shopping - I am sure some of you would have already started shopping for Christmas. And with shopping - there are gifts.. and with gifts - there's wrapping! Gift bags can be costly at times - so, I thought it would be fun to have a quick tutorial on how to make your very own customized gift bags without the need to measure, score or use a cutting machine.


Here's the step-by-step on how to DIY your own gift bag.

1. Get a piece of 12x12 patterned paper and fold the top over about an inch. Use a bone folder to smoothen out the crease. If you are using a single-sided patterned paper like me - make sure the pattern is on the outside.


2. Next, with the crease you just made (at the top), fold both sides of the paper in - towards the middle. Here, just adjust according to the size of your gift. Make one side is overlapping the other. Adhere it with the adhesive of your choice. You can use washi tape too.


3. Then fold the bottom upwards - about 2-3 inches. This again, is dependent on the size of your gift. The bigger your fold is, the smaller your gift bag will be.


4. Next, fan out the fold like an alligator mouth :)


5. Fold the top and bottom towards the middle like so - and adhere it down. I am using washi here but you can use anything you want as long as it is strong - so that your gift is secured.


6. Finally, fold the top down to seal your gift bag. You can also opt to punch two holes and thread a ribbon through!


And here is the finished product! A lovely gift bag with a personalized gift tag! I am using the All Girl digital stamp from The Stamping Chef and I colored it in with my Copic markers. Of coz I had to add some razzle dazzle to it by adding some Worn Lipstick & Diamond Stickles.


***

We have blog candy for those who are a follower of All that Stickles and leave a comment on every stop of the hop! Winners will be announced Wednesday November 20th at All that Stickles.

Fresh Brewed Designs
$15 Gift Certificate


Bugaboo Stamps
7 Digital Stamps of Winner's Choice


The Stamping Chef
3 Digital Stamps of Winner's Choice
(If you email TSC letting them know you're hopping with us, you'll receive a free image!)
info@thestampingchef.oo.gd

SKdigis
2 Digital Stamps of Winner's Choice

Your next stop is Karen N.'s blog! 

Here's the complete lineup:
All that Stickles
Tonya
Chas
Ann
Cathie
Sonia
Angeline
Karen N.
Karen S. 
La-Vie - Featured Fan

Thanks for hopping! :) Don't forget to check out our Let's Talk Turkey Linky Party!

Share
Tweet
Pin
Share
14 comments
Yesterday I taught my first scrappy class at Scrap-n-Crop. It was my mini album workshop - using Webster's Pages New Beginnings collection. This album I made is for my niece Bel :)

Note: *Heavy photo post*!


Here are some of the ladies from the workshop. Thanks for your support ladies :)


Share
Tweet
Pin
Share
No comments
For my Guest Designer @ Housecalls by Scrappin Madge post, click HERE to see my altered frame.

***

Today for Sister Act Card challenge, I have a very interesting card to share with you. Today's sponsor is Rick St Dennis and he has such amazing digital art! I had a tough time deciding which image to use coz everything was just so lovely!

Here's what I made today. Yups. Another Christmas card :)


I am using "Isabella last minute gifts". She's just a fun image to color in with my Copics and isn't his digital stamps awesome?


Here's another close up


For your chance to win some digital stamp from Rick St Dennis, link up your cards HERE.

Challenges:
Crafting by Designs "Anything with a twist of Christmas"
Challenges 4 Everybody
Great Impressions Stamps "November challenge"
Sweet Stampin Challenge "Christmas"
Make it Monday #166

Share
Tweet
Pin
Share
8 comments
Newer Posts
Older Posts

About Me

Hi. I'm Angeline Choo.
This is a place where I share my latest scrappy ideas, creations and anything scrappy. Read more about me in my Scrappy Resume

Follow Me

  • Facebook
  • Instagram
  • Youtube
  • Twitter
  • Bloglovin

Current Design Team

Unity Stamp

recent posts

Blog Archive

  • ▼  2020 (14)
    • ▼  July (1)
      • Happy 11th Birthday Unity Stamp!
    • ►  May (3)
    • ►  April (1)
    • ►  March (5)
    • ►  February (2)
    • ►  January (2)
  • ►  2019 (18)
    • ►  December (1)
    • ►  November (3)
    • ►  October (3)
    • ►  September (1)
    • ►  August (2)
    • ►  June (2)
    • ►  May (3)
    • ►  April (2)
    • ►  January (1)
  • ►  2018 (37)
    • ►  December (7)
    • ►  November (1)
    • ►  October (1)
    • ►  September (5)
    • ►  August (1)
    • ►  July (3)
    • ►  June (2)
    • ►  May (3)
    • ►  April (1)
    • ►  March (3)
    • ►  February (3)
    • ►  January (7)
  • ►  2017 (80)
    • ►  December (7)
    • ►  November (6)
    • ►  October (6)
    • ►  September (6)
    • ►  August (5)
    • ►  July (9)
    • ►  June (8)
    • ►  May (7)
    • ►  April (8)
    • ►  March (8)
    • ►  February (4)
    • ►  January (6)
  • ►  2016 (109)
    • ►  December (11)
    • ►  November (10)
    • ►  October (12)
    • ►  September (4)
    • ►  August (11)
    • ►  July (10)
    • ►  June (10)
    • ►  May (8)
    • ►  April (8)
    • ►  March (5)
    • ►  February (11)
    • ►  January (9)
  • ►  2015 (147)
    • ►  December (9)
    • ►  November (13)
    • ►  October (15)
    • ►  September (12)
    • ►  August (13)
    • ►  July (9)
    • ►  June (12)
    • ►  May (16)
    • ►  April (11)
    • ►  March (8)
    • ►  February (11)
    • ►  January (18)
  • ►  2014 (132)
    • ►  December (13)
    • ►  November (10)
    • ►  October (13)
    • ►  September (10)
    • ►  August (8)
    • ►  July (10)
    • ►  June (10)
    • ►  May (10)
    • ►  April (13)
    • ►  March (13)
    • ►  February (11)
    • ►  January (11)
  • ►  2013 (175)
    • ►  December (10)
    • ►  November (18)
    • ►  October (19)
    • ►  September (10)
    • ►  August (17)
    • ►  July (13)
    • ►  June (14)
    • ►  May (17)
    • ►  April (12)
    • ►  March (13)
    • ►  February (9)
    • ►  January (23)
  • ►  2012 (74)
    • ►  December (4)
    • ►  November (2)
    • ►  October (14)
    • ►  September (2)
    • ►  August (16)
    • ►  July (9)
    • ►  June (11)
    • ►  May (3)
    • ►  April (3)
    • ►  March (4)
    • ►  February (4)
    • ►  January (2)
Angeline Choo @ ScrappyScrappy. All rights reserved. Be nice. Don't steal. Powered by Blogger.
Facebook Instagram Youtube Twitter Bloglovin
Logo background vector created by denamorado - www.freepik.com

Created with by BeautyTemplates| Distributed By Gooyaabi Templates